Getting a new air conditioner isn’t something you do every day, but when it’s time, you want it done right. I’ve worked with homeowners across Dallas, Fort Worth, and Houston, and the same question always comes up – how do I know if my AC is being installed properly?
That’s why I’ve put together this step-by-step AC installation checklist, a guide I wish more people had before calling their contractor. Whether you’re replacing an old unit or installing for the first time, this will walk you through the essentials and help you avoid the common pitfalls.
Before Installation: Preparation Makes All the Difference
I’ve seen installs go sideways just because the prep work was rushed. Here’s what I recommend you check off first:
1. Choose the Right AC Unit
We always start by looking at the size of your home, how well it’s insulated, and even which direction your windows face.
Green Leaf Air had cases where a client chose a high-efficiency unit that was technically “better,” but oversized for their home. It cooled the space too quickly, leading to poor humidity control and uneven comfort.
Bigger isn’t always better. We make sure the system fits your home’s actual cooling load, not just a number on paper.
2. Time It Right
Summer installs get booked up fast. If you can, schedule your installation in spring or fall when HVAC teams aren’t swamped. You’ll usually get faster service and better flexibility.
3. Clear the Work Areas
Before our crew arrives, we always recommend moving anything that might block access to the indoor unit or outdoor condenser. The outdoor unit should have at least 2–3 feet of clearance for proper airflow.
4. Permits & Power
Cities like Dallas or Houston often require a permit for AC replacement or installation. Your HVAC contractor should handle it, but it’s good to double-check. Also, confirm that your home’s electrical panel can handle the load for the new unit.
Our Step-by-Step AC Installation Checklist
Every installation follows a process. Skipping a step or rushing one can cost you down the road.
Step 1: Unpack & Inspect
Before anything goes in, I open the box, check for damage, and lay out every part. It may sound basic, but catching a dented coil or missing bracket upfront saves hours later.
Step 2: Mount the Indoor Unit
For ductless or wall-mounted systems, I secure a mounting bracket, making sure it’s level and properly anchored. This helps avoid vibration and noise issues.
Step 3: Install Indoor Components
With the bracket in place, I connect wiring, control cables, and refrigerant lines according to the manufacturer’s instructions. This is where precision really matters; loose wires or over-tightened flares can cause system errors or leaks.
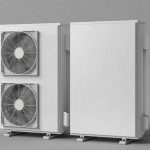
Step 4: Position the Outdoor Unit
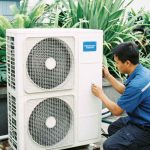
I always find a spot with plenty of airflow and shade, if possible. Never cram it against a wall or under a deck. And I use a pad to keep it level and off the ground.
Step 5: Connect Refrigerant Lines
Cleanliness here is non-negotiable. I flush the lines, then connect them with a torque wrench. After that, I pressure test and vacuum the lines to ensure there’s no air or moisture inside. That step alone can prevent future compressor issues.
Step 6: Electrical Hookup
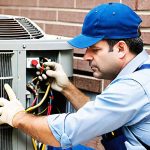
I connect the system to power using proper gauges and weather-resistant materials. I also installed a disconnect box within reach, as required by code.
Step 7: Final Testing
Once it’s wired and sealed, I turn it on and test performance. Is it cooling evenly? Any odd noises or vibrations? I take readings for refrigerant pressure, amperage, and airflow to confirm everything’s running smoothly.
After Installation: Keep It Running Like New
Once the system’s in, there are a few things I always remind homeowners to do:
- Change your filters every 3-6 months
- Keep the outdoor unit clear of debris and leaves
- Use ceiling fans to reduce cooling strain
- Check refrigerant levels yearly
- Schedule a professional tune-up each spring
We had one customer in Fort Worth who skipped maintenance for two years until their compressor failed in the middle of July. Regular checkups are a small price to pay to avoid major breakdowns.
What Are the Common AC Installation Mistakes & How to Avoid Them
Even the best equipment won’t perform well if installed incorrectly. Here are the biggest mistakes I’ve seen and fixed.
Ignoring Insulation
This one gets overlooked all the time. If your attic or ductwork isn’t properly insulated, your AC will be fighting an uphill battle from day one.
I remember visiting a home where the return duct in the attic was pulling in 120°F air; no surprise the homeowner couldn’t get the house below 80. A quick fix to insulation made a huge difference. Before you install, make sure those weak spots are sealed.
Incorrect Unit Placement
Where the system goes really matters. I’ve seen indoor units installed right above stoves or next to sun-baked walls; not ideal. For outdoor units, cramming them behind bushes or under decks chokes off airflow.
At Green Leaf Air, we take placement seriously because it directly affects how well the system performs and how long it lasts.
Skipping Refrigerant Line Cleaning
Refrigerant lines aren’t something most homeowners think about, but I do, every time. If those lines aren’t flushed and vacuumed before installation, moisture or debris can get in and cause major damage later.
I’ve seen compressors burn out in under a year because someone rushed this step. It’s one of those behind-the-scenes details that separate a good install from a great one.
Final Thoughts
Installing an AC isn’t just about putting in a new machine; it’s about creating a reliable, efficient cooling system that serves your home for years. Follow this AC installation checklist, and you’ll avoid the common traps that cause problems down the road.
And if you’re in Dallas, Fort Worth, or Houston and want it done right the first time, Green Leaf is always ready to help.
FAQs
How Long Does AC Installation Usually Take?
Most standard central AC installs take about one day. If ductwork or zoning is involved, it can take up to two days. At Green Leaf Air, we streamline the process so your home isn’t disrupted longer than necessary, and we always keep you updated every step of the way.
Can I Keep My Old Thermostat With a New System?
If it’s compatible, yes. But with newer systems, we often recommend a smart thermostat for better performance and energy savings. Green Leaf Air installs and configures these thermostats as part of your system setup, so you get more control and long-term efficiency from day one.
Should I Replace My Ducts During AC Installation?
If your ducts are leaking, too small, or poorly insulated, replacing them can boost efficiency. We evaluate your ductwork during our in-home assessment and offer honest recommendations so your system performs at its best, not just on paper, but in real comfort.
Is It Normal for a New AC to Smell or Make Noise?
Some light smells or humming are normal at first. But loud noises or musty odors could mean an issue. With Green Leaf Air installations, we test everything thoroughly and walk you through what’s expected, so there are no surprises once we leave.
When Can I Turn On My New AC After Installation?
Right after final testing. We make sure it’s safe and ready before we leave. Green Leaf Air’s final inspection includes system startup, performance checks, and guidance on using your new AC, so you can enjoy comfort right away with confidence.